Table of contents
1. Introduction
This document describes how to add a PaP/PaPs to an existing reference train and how to create the reference train. It will not describe how to edit and manage locations or use PaP search, etc.
If you want to read about those in more detail, please find the relevant document in the library.
2. Access edit mode
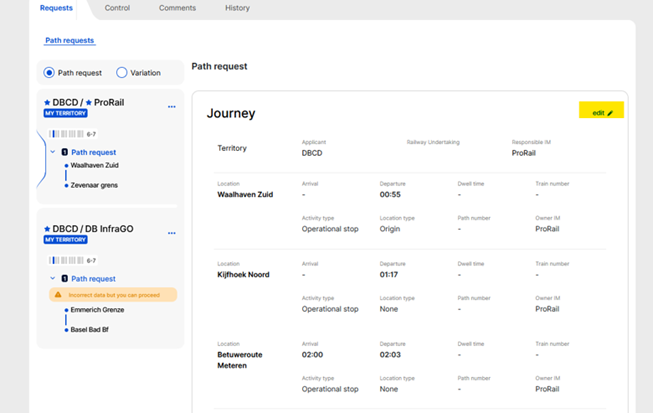
Users should open the existing reference trans in edit mode to add the PaP.
3. Add PaP
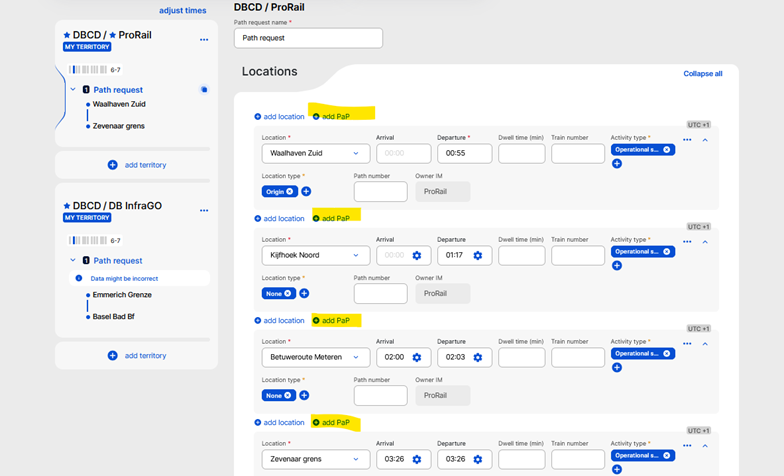
When editing an existing reference train in the editing view, the “+ add PaP” option is available at each location card.
4. Select PaP
After pressing the “+ add PaP” button, the select PaP view opens where the Applicant can search for a PaP. By default, the results are filtered by IM, and calendar days are either an exact match or a subset of the days already in the request. These default filters cannot be edited or removed, but users can add more criteria to them, e.g. search by locations included or origin/destination, etc.
5. Reorder PaP
There is an important action that the applicants must take. They need to check the order of the selected PaP sections and reorder them if they are not in the right order. This is the only step that they can do; if it is missed, they need to cancel the process and restart it from the beginning.
The order of the PaPs can be changed by dragging and dropping them.
Hover over the dotted area the mouse cursor will change to indicate that the drag and drop can begin. Click with the mouse cursor and hold it down until the PaP section is placed in to correct order, then release the mouse button.
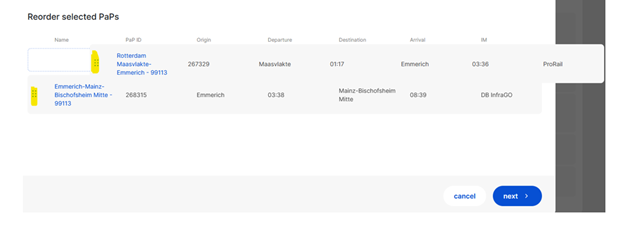
If the PaP or PaPs are in the right order, users should click “next” to go to the Journey step, where they can start building their journey. Manage their territory and location.
If you want to read more about how to manage them, find the relevant document in the library.