Table of contents
- 1. Introduction
- 2. Precondition
- 3. How to start
- 4. Steps of the Create New Dossier Wizard (CNDW) for PaPs
1. Introduction
It will describe how to create a new dossier from the PaP search. The aim is to create a simple use case to show the dossier creation from the PaP search. It does not describe “How the PaP search works, “How to search for PaPs”, “How to add PaPs to an existing”, How to edit and copy the train parameters or “How to edit agencies”. If you would like to read more about them you can search in the library.
All rules concerning applicants to use C-OSS PaP products (or Reserved Capacity) are described in the Corridor Information Document (CID) which can be downloaded from each of the Rail Freight Corridors’ websites. In case of further questions, please contact your C-OSS managers of the Rail Freight Corridors.
2. Precondition
The precondition is to be familiar with:
- How to search for PaP
- PaP types (flex or fix)
- PaP restrictions
3. How to start
Go to the PaP search view and select the required PaPs that you would like to create the dossier from.
In the below example, the C3NP01 flex PaP offer from RFC 03 entire stretch had been selected for demonstration purposes.
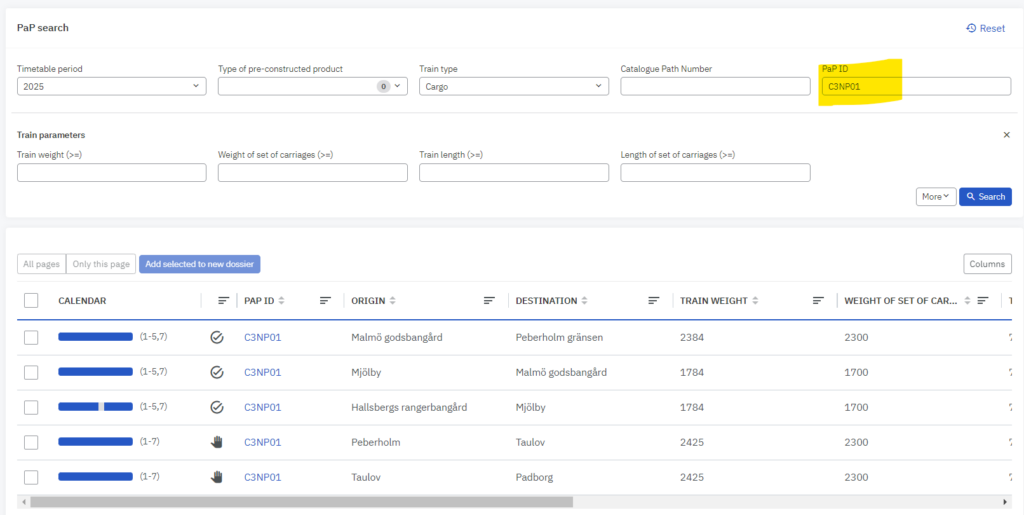
In the grid. the first column is the checkboxes where you can select some or all of the PaPs that fit your business needs.
3.1 Add selected to a new dossier
By default the “Add selected to a new dossier” button is disabled. You need to select a minimum of one PaP section then the button will be enabled (becomes blue)
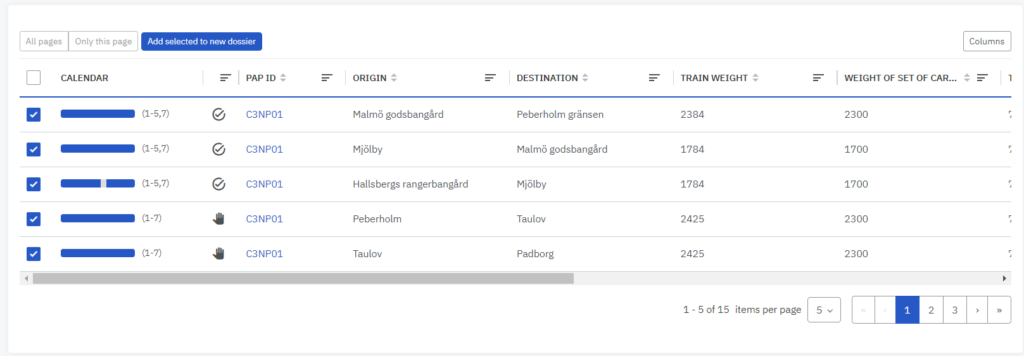
Press the “Add selected to a new dossier” button to create a new dossier from the selected PaP sections.
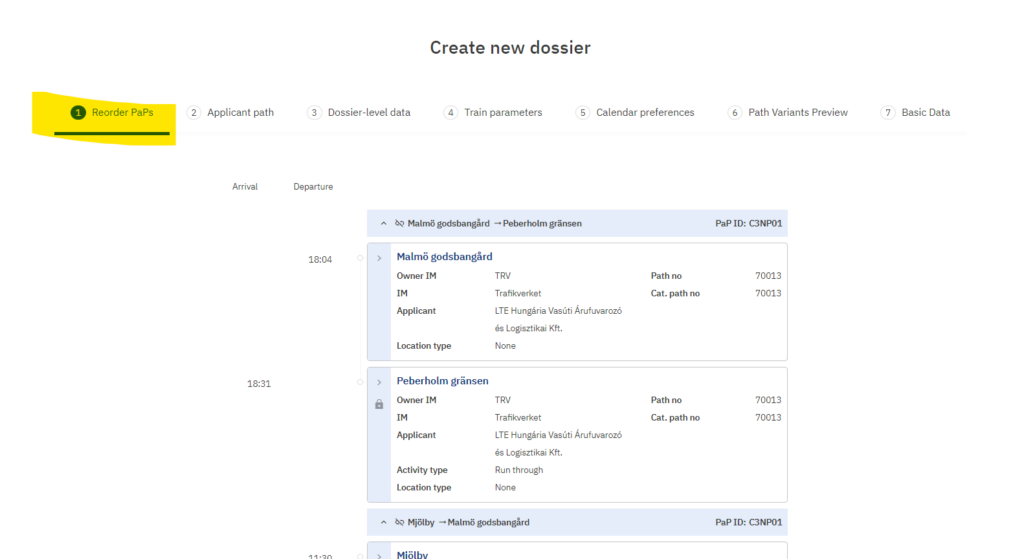
It opens the Create New Dossier Wizard view for PaPs where at the first step you start with reordering the PaP.
4. Steps of the create new dossier wizard
Follow the steps in the wizard to create your dossier from the PaP search.
4.1 Reorder PaPs step
The system adds your PaP in the same order as how they were selected in the previous step which is not always the correct order of the stretch. In this step it allows you to reorder your PaP sections.
To easily manage to reorder your PaP sections. It is useful to collapse the PaP sections by pressing the arrow in their headers on the top left side. You will have a better overview of the arrival and departure times.

After the overview, the geographical order of the sequence of PaP sections and the arrival/departure times do not follow the right order of how the PaP was constructed in a harmonized way.
You need to reorder them.
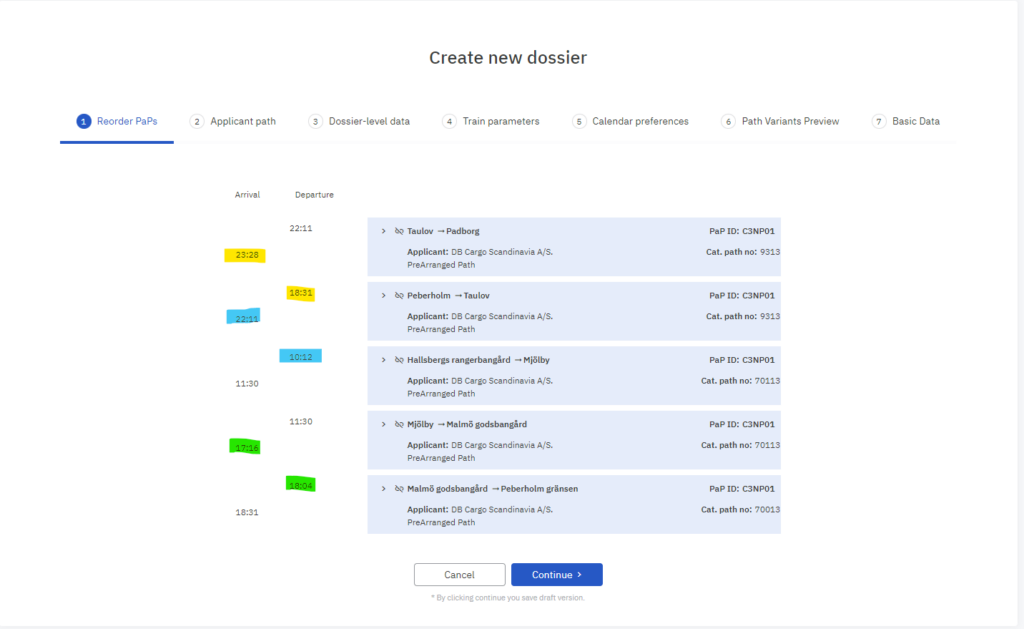
In the above example, the 3rd PaP section should be on the top. To start the reorder, hover your mouse in the PaP header area where the mouse cursor turns into the four-direction arrow. (This mouse cursor you should be familiar with, the Windows operating system uses the same mouse cursor image). Holding down the mouse button on the header and starting to move the system indicates the selected PaP section with a green border, highlighting the current position. It allows you to move it up to the top where it should be the starting PaP section. In the green area, it indicates the possible directions in green arrows up or down. With this reordering function, you can move all PaP sections to the right place.
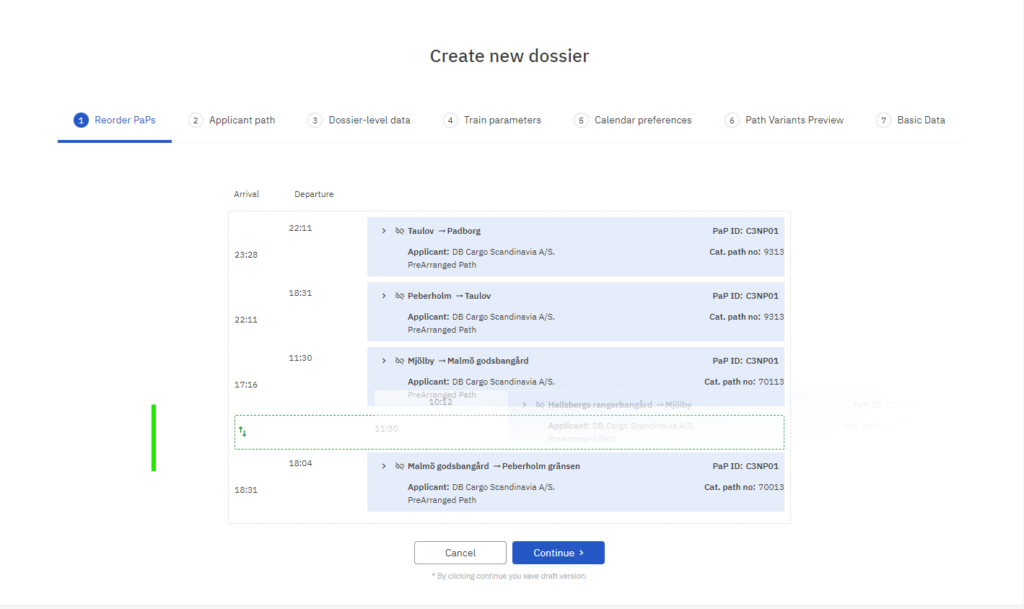
After checking the geographical order and timings look all correct, press “Continue” to proceed to the applicant path step.
4.2 Applicant path
In this step, you may notice that the PaP sections have a coloured border. The colour of the borders depends on the type of the PaP that had been selected previously. When the dossier is created from not a PaP section, so-called tailor-made path sections, they do not have any strong coloured border indications. See an example, if we add a path section above the PaP section for presentation purposes.

The PaP section has some restricted fields that you cannot edit, it is because the PaP sections are preconstructed Paths prepared by the RFCs.
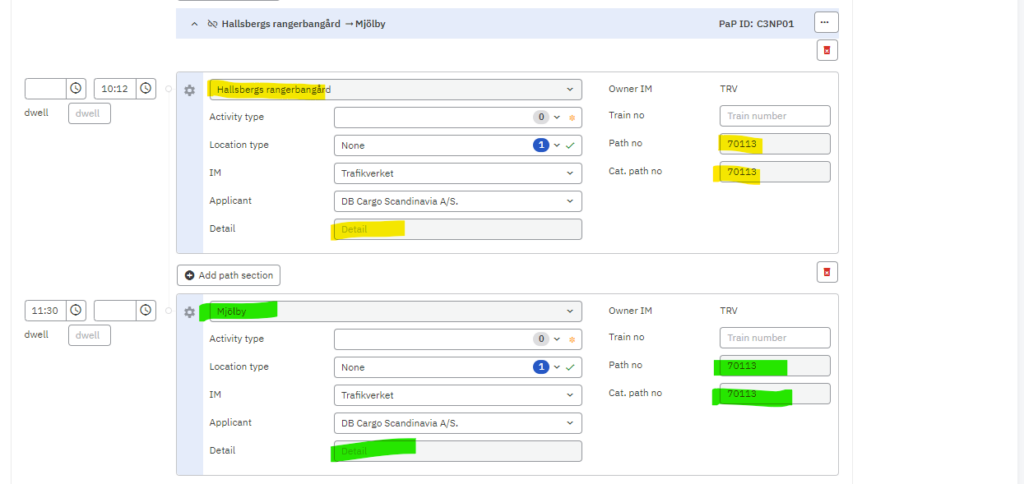
The tailor-made path section was removed and we are back to the use case to continue.
The PaP sections are prefilled with recommendations, any changes that are individually required (flexible times, path sections, parameters) to be adjusted/inserted by the applicants it is checked by the RFCs/IMs later in their phases.
The following fields are allowed to be edited in our example:
- arrival/departure times including earliest/latest/public times
- dwell times
- activity/location type
- responsible IM/Applicant
- train number
- subpath title
- common descriptions among sub-paths that are combined into the “Service days for reference point”
- Add/remove path sections
We decided not to edit them, we were happy with what we got, so we continued further and filled them later out.
4.3 Dossier-level parameters
The leading RU and the leading IM have been selected automatically. When the dossier contains PaPs, the RFCs will be the responsible for the coordination.
Also, the leading role can be changed later. For this case, you can check the “How to edit agencies” documentation.
In our example, there are no dossier-level data that should have been entered, to give a response to the IMs/ABs questions.
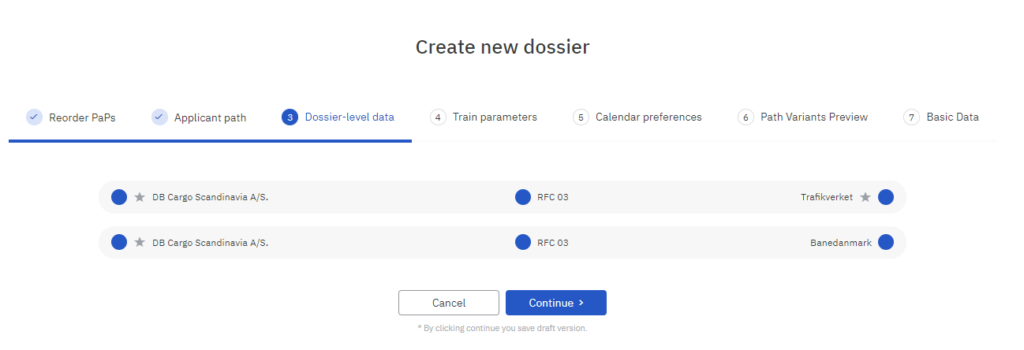
If there were any little arrows presented next to the traffic light indicating that there were fields you should fill them out. It also can be skipped and later edited.
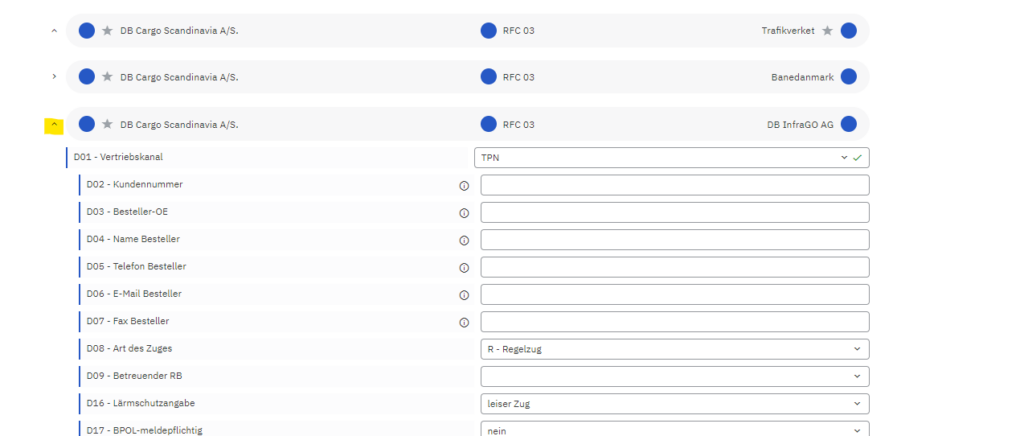
4.4 Train parameters
Here should fill out the parameters of the PaP path sections. We can see that some of the parameters, such as loco type, train length, train weight have been already pre-filled by the C-OSS during the publication. It is possible to change the loco type and may define the weight and length of our carriages. Then ask PCS to recalculate the correct length and weight of the train based on the values entered.
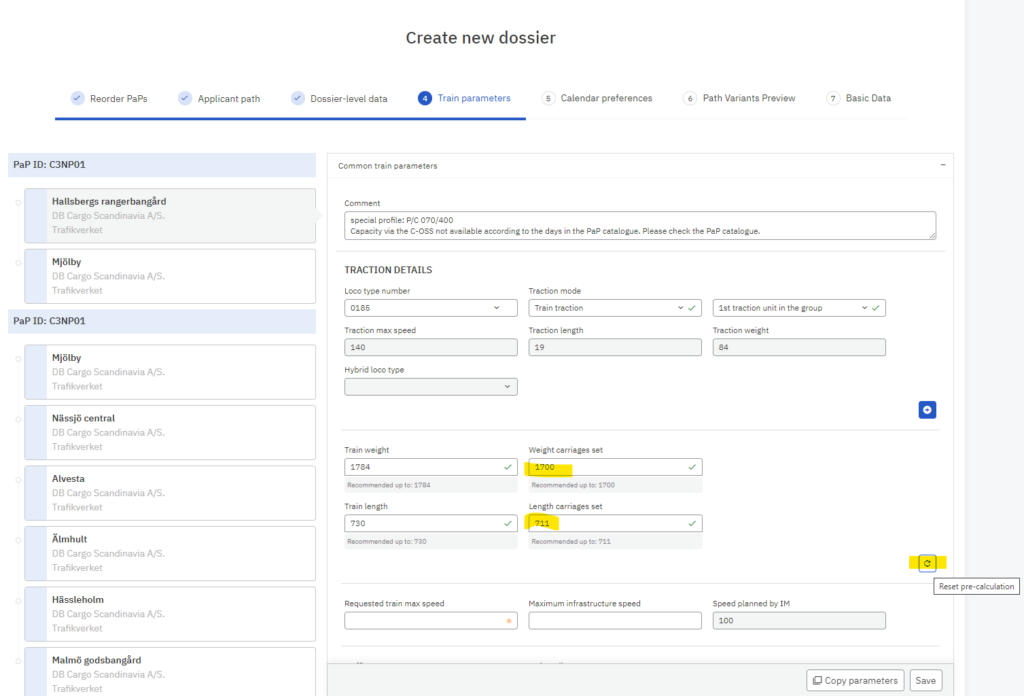
Also, we decided to skip this step as it can be filled out later once the dossier is created.
4.5 Calendar preferences
Apply the running days when the train should run.
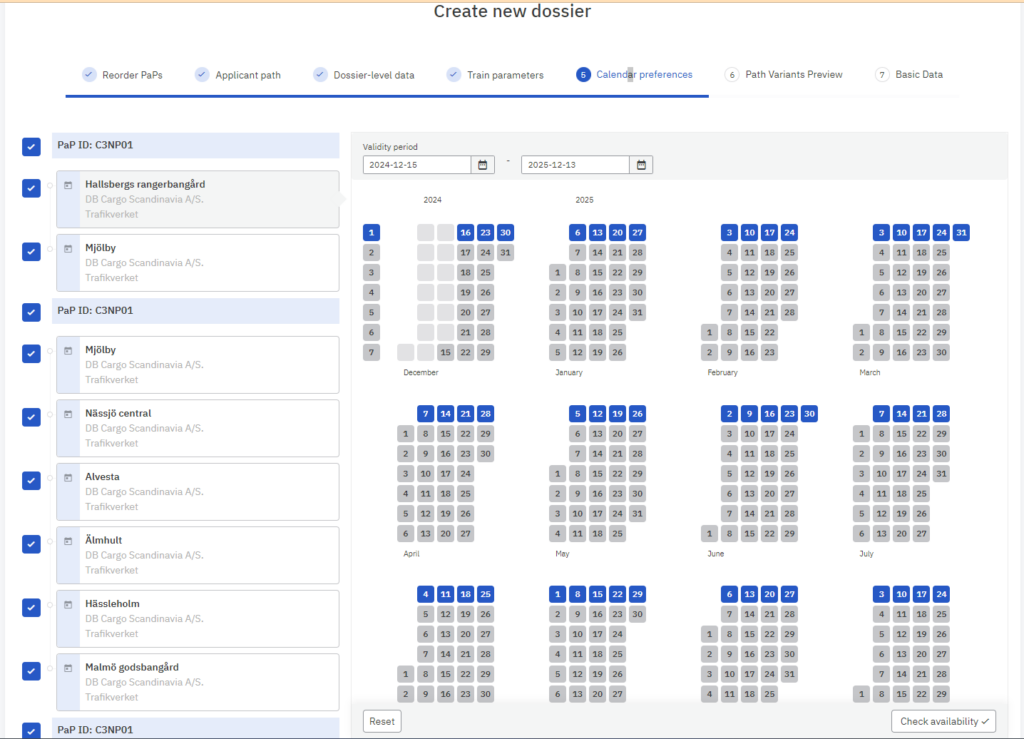
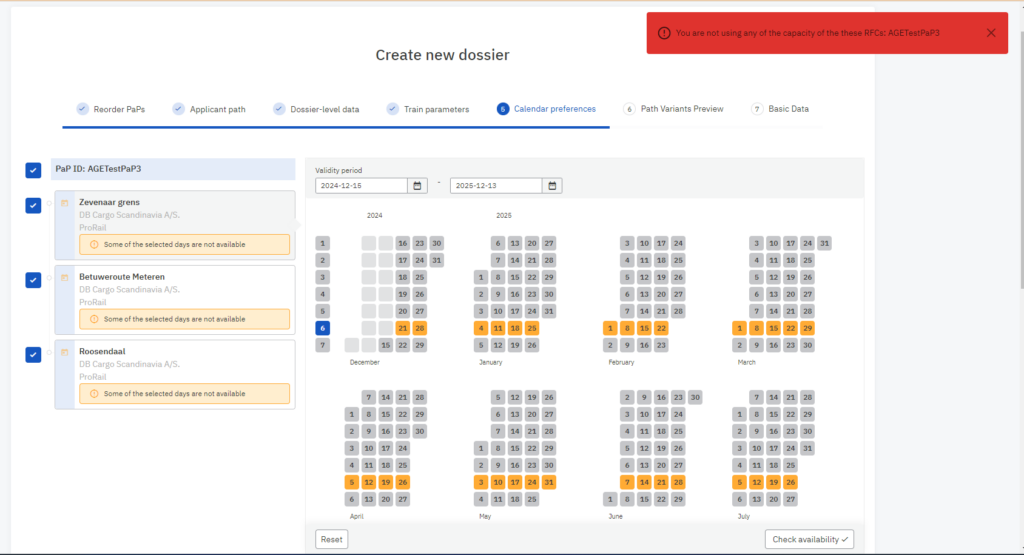
Then check if the PaP is available on the requested days by pressing the button. If the PaP is not available will show a “some of the days are not available” warning.
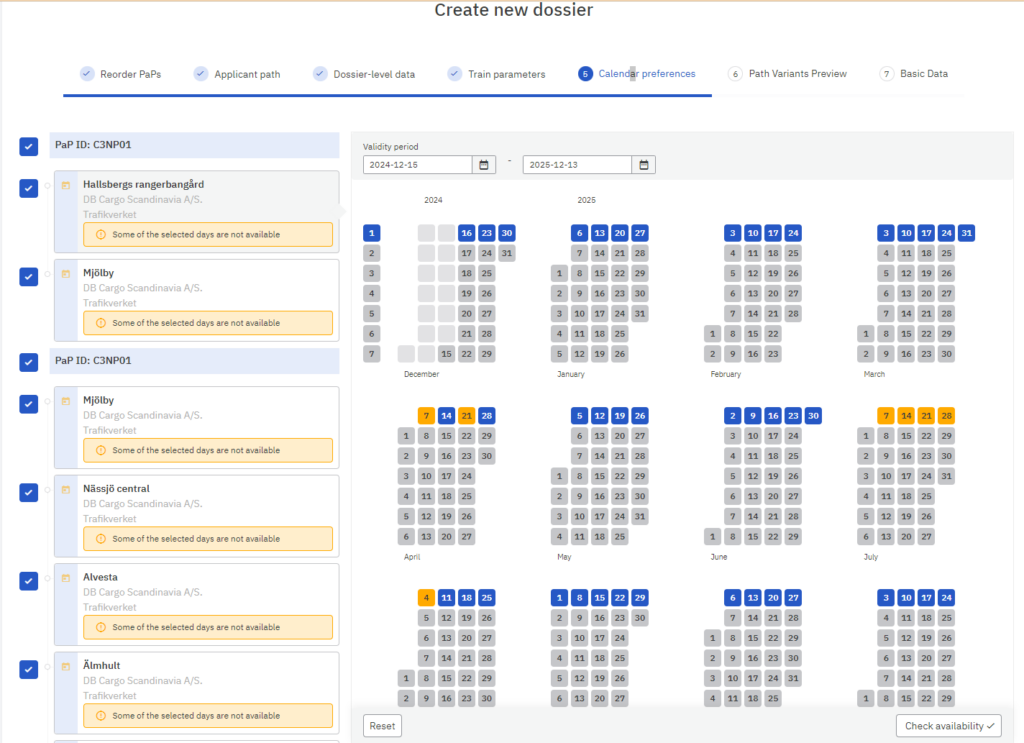
PCS warns you that the calendar is not fixed. It looks like the selected PaPs are not available on some of the days in the year marked with yellow. You can choose that PCS automatically resolves it for you by going further into the next step in the Path variant preview.
The possible error could be here if you select the running days in the reference calendar when the PaP is unavailable, then the PCS will warn you: “You are not using any capacity of these RFCs XYZ (PaP).
In our example, the PaP is published on day 3 only and there will be no PaP capacity for day 6. You should resolve the warning because PCS prevents you from going further to the preview.
4.6 Path variants preview
In the Path variants preview you can check the entire route. PCS displays the variation in how and which PaPs are used in the sub-paths, which variant uses which PaP and which days of that PaP.

In this step first, time the outline is presented.

4.7 Basic data
The last step is to name the dossier and press the button to create the dossier.
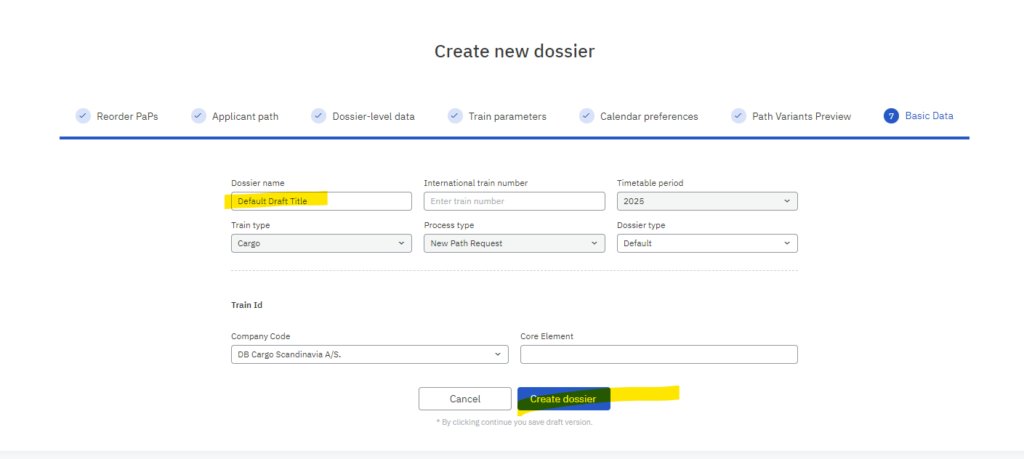
The dossier is created in the Open phase in v.1.
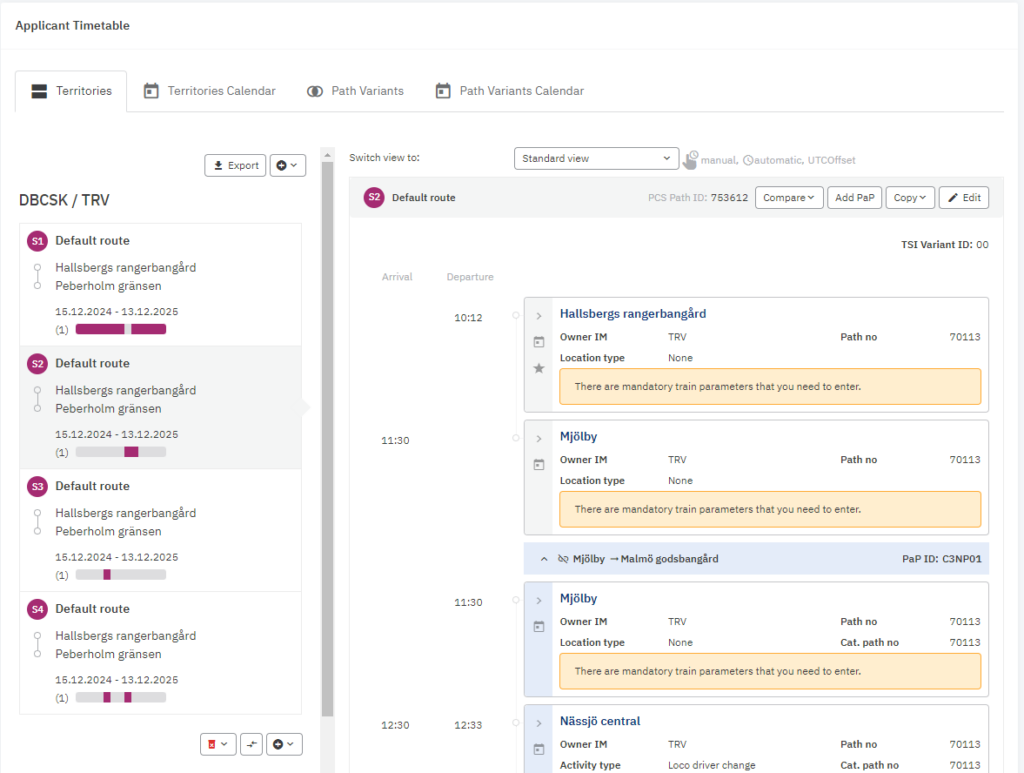
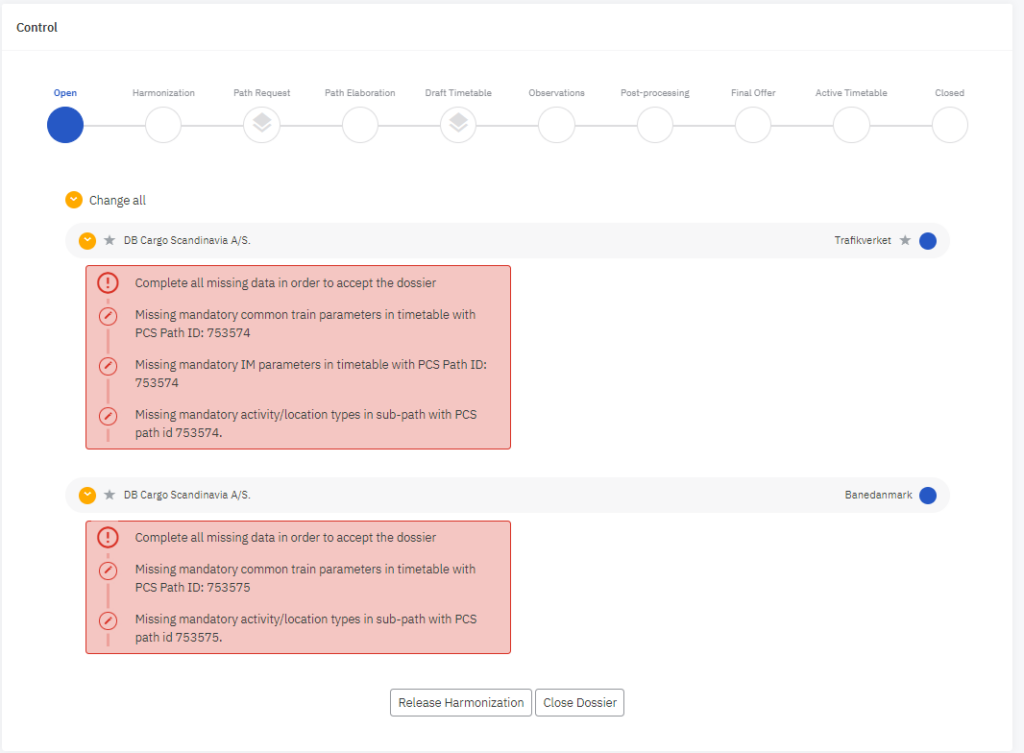
With the last steps, you can edit the dossier and fill in the missing common train/IM parameters and activity/locations type. Hit the pencil icon which will direct you in edit mode to the sub-path that you should fix.
